

Welcome, traders. Today, we’re diving deep into the mechanics of building robust positions in the volatile crypto market. Forget chasing unrealistic 100% win rates; success lies in smart strategy, disciplined risk management, and a clear understanding of momentum. This guide will walk you through two powerful, practical strategies—the Room Strategy and the EMA Rule—that can help you navigate markets like Bitcoin and Ethereum with greater confidence and structure.
The Foundation: Mindset and Market Realities
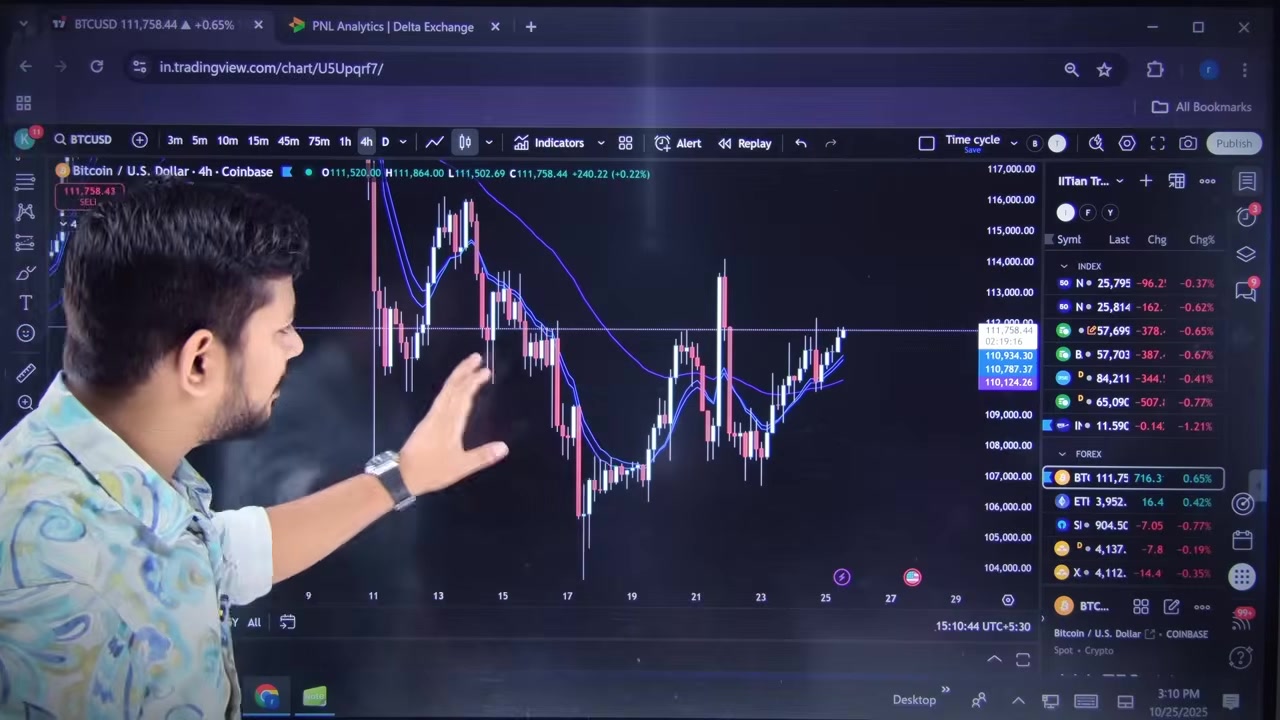
Before we touch a chart, let’s align our expectations with reality. A common misconception among new traders is the pursuit of a perfect, near-100% win rate. This is not only unrealistic but dangerous. The crypto market, with assets like Bitcoin and Ethereum, is defined by its momentum—swings that can be 2000 points one day and barely 1000 the next. Sometimes it moves slowly, and other times it surges rapidly.
The first and most crucial step is always to look at your pocket. This means honestly assessing your capital and determining what you can afford to risk. Your trading size must be based on your preserved capital, not on hopes of massive, immediate gains.
The goal isn’t to win every trade. A more sustainable approach is to aim for a scenario where, out of 6-7 trades, even if 3-4 hit their stop-loss, the remaining profitable trades are substantial enough to yield an overall profit. I don’t need a 100% or even 90% win rate. Why? Because a single losing trade in a high-leverage environment can be devastating. Here, no one is your friend; the market is ruthless. For those new to crypto trading, the learning curve is steep, but it begins with accepting this fundamental truth.
Strategy 1: The Room Strategy for Position Building
This is a foundational technique for entering the market, especially useful for major coins like Bitcoin and Ethereum. It’s a form of position averaging that reduces risk and improves your entry price.

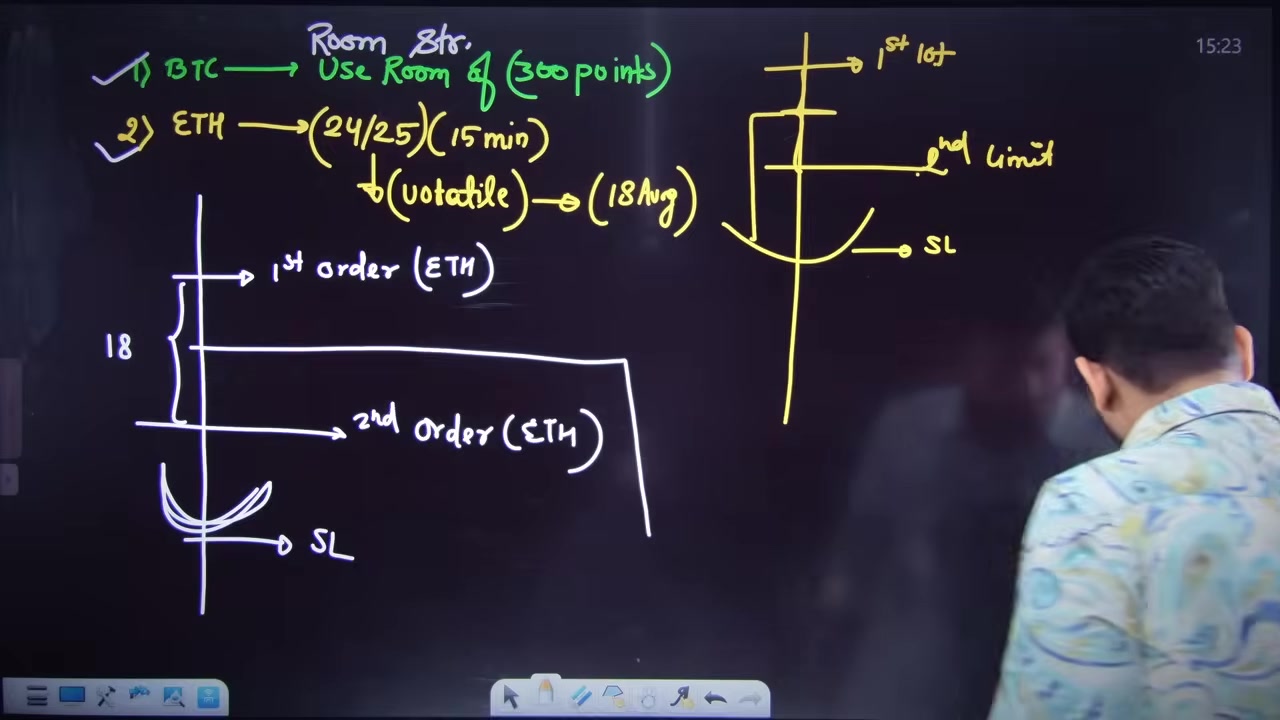
Let’s break it down with a Bitcoin example. Suppose, based on my analysis of the 15-minute chart, I expect a move of about 300-350 points. If I want to buy 2 lots, the wrong approach is to buy both lots at once at the current price.
The Room Strategy process is as follows:
- Split Your Order: Divide your intended position into two parts. For example, instead of 2 lots at once, plan for 1 lot now and 1 lot later.
- Place Initial Entry: Buy your first lot (e.g., 1 Bitcoin) at your identified entry point.
- Set a Pending Order: Place a buy limit order for your second lot (the second Bitcoin) at a price below your initial entry—say, 300 points lower.
- Manage the Outcome: This creates two scenarios:
- If the price rises: Your first lot is already in profit. You caught the upward move.
- If the price dips: Your second order triggers, averaging down your total entry price. Now, a smaller rebound is needed to bring your entire position to breakeven or profit.
This method is also called a “Buy Dips” strategy. The benefit is immense: it provides a buffer against volatility. Whether Bitcoin makes a confirmed upward move or a pullback, your strategy has a plan to capitalize on it. The key is that your second entry point must be strategically placed at a meaningful support level, not an arbitrary number.
This isn’t just theory. Applying this to Ethereum follows the same principle. On the 15-minute chart, Ethereum might show 25-point momentum swings. You structure your entry the same way: first entry, second entry lower. The lot size or quantity is divided similarly. The core takeaway is that you are building a position over a price range, not gambling on a single price point.
Strategy 2: The Advanced EMA Rule for Precision
For traders ready to add another layer of sophistication, the EMA Rule helps in identifying high-probability entry zones, direction, and stop-loss placement. It requires a bit more focus but offers three clear benefits: identifying the trend direction, pinpointing support/resistance (SN) areas, and providing a structured position-division ratio, much like the Room Strategy.

Here’s how to implement the EMA Rule:
- Set Up Your Chart:
- Timeframe: 15-minute chart.
- Indicators: Apply three Exponential Moving Averages (EMAs). Set the first to 9, the second to 11, and the third to 45. You can change their colors for clarity.
- Determine Direction (Step 1):
- Ignore the 9 and 11 EMAs for this step. Focus only on the 45 EMA.
- If the price is trading above the 45 EMA, the market bias is bullish. Look for buying (long) opportunities.
- If the price is trading below the 45 EMA, the market bias is bearish. Look for selling (short) opportunities.
- This simple filter keeps you on the right side of the higher-timeframe momentum.
- Identify the Entry Zone (Step 2):
- Now, bring the 9 and 11 EMAs into view. The area where these two fast EMAs (9 and 11) converge or move together often acts as a dynamic support (in a bullish trend) or resistance (in a bearish trend) zone.
- This convergence area is your potential entry zone. In an uptrend, you look to buy near this area when price pulls back to it.
- Build Your Position (Step 3):
- Once you have a direction and a zone, use the Room Strategy principle to divide your position. For example, plan to enter 50% of your lot in the identified zone and place a limit order for the remaining 50% at a deeper support level below.
Putting It All Together: A Practical Example
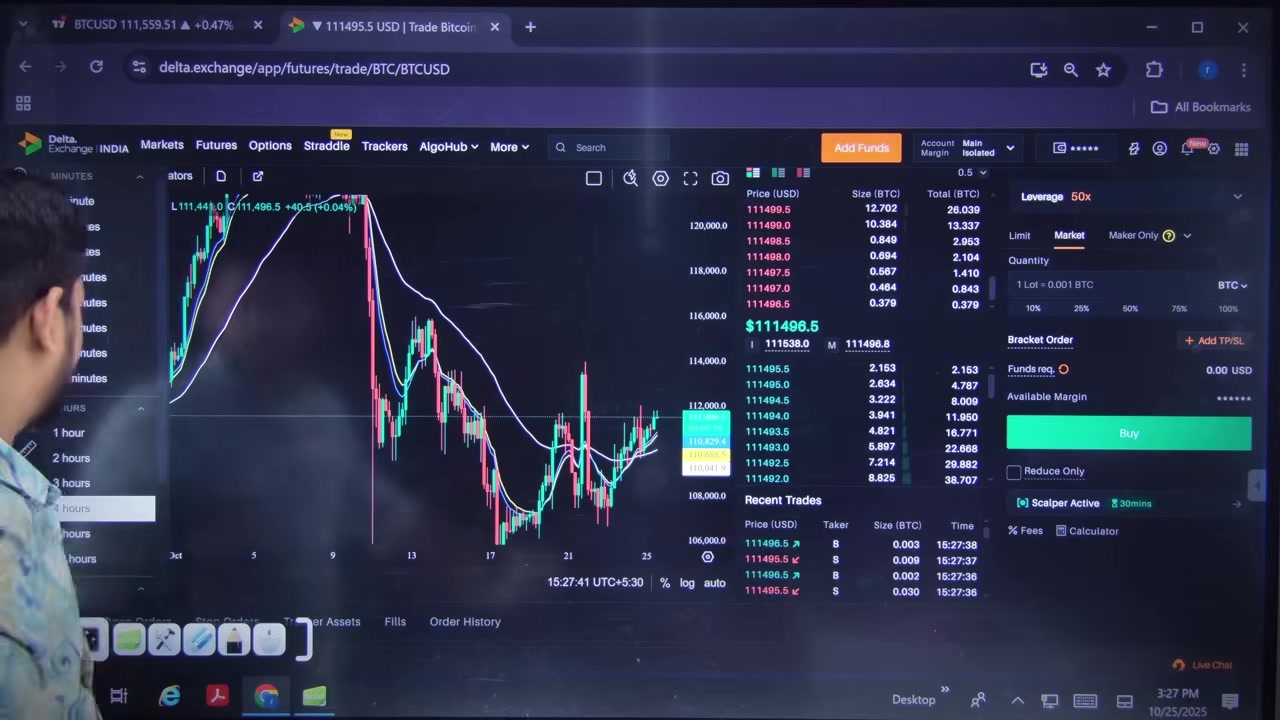
Let’s say on the Bitcoin 15-minute chart, the price is above the 45 EMA (bullish bias). The price pulls back and touches the area where the 9 and 11 EMAs are weaving together. This is your signal.
- Action: You initiate your first buy order here.
- Stop-Loss: Your stop-loss should be placed below the nearest significant support. Often, this is just below the recent swing low or decisively under the 45 EMA. The exact distance depends on your risk tolerance and the chart’s volatility.
- Second Entry: You place a limit buy order for your second lot at a stronger support level, perhaps near the 45 EMA or a previous consolidation area.
This method systematically gives you a direction, a zone, and a risk-managed position-building plan. It removes emotion and replaces it with a clear, repeatable process.
Key Takeaways and Final Thoughts
Trading cryptocurrencies profitably is less about secret indicators and more about disciplined execution of sound strategies. It requires patience and a willingness to learn. As demonstrated in my own trading, these methods—like the Room Strategy I’ve used to manage positions—are about working with the market’s volatility, not against it.
Remember these core principles:
- Protect Your Capital: It’s your most important tool. Never risk more than you can afford to lose.
- Embrace Realistic Win Rates: Aim for a profitable system, not a perfect one.
- Build, Don’t Bet: Use position-averaging strategies like the Room Strategy to enter markets smoothly.
- Add Context with Rules: Tools like the EMA Rule provide objective criteria for direction and entry, removing guesswork.
- Always Use a Stop-Loss: Define your risk before every trade. Know where you’re wrong.
The journey to consistent trading is a marathon. Start by paper-trading these strategies. Backtest them, get comfortable with the rules, and then apply them with small, risk-controlled positions. The market will always be there; your job is to ensure you are too, with your capital intact and your edge sharpened. For those looking to explore other methods of engaging with the crypto ecosystem, from trading to earning, consider diversifying your approach with play-to-earn opportunities that can build your asset base. Remember, every expert was once a beginner who chose to focus on the process, just like the structured learning found in a month-long crypto experiment.